Introduction: Understanding the Importance of Floor Sanding
Floor sanding is an important process for maintaining and restoring wood floors. Its purpose is to remove the top layer of the wood floor, revealing a fresh, new layer of wood underneath. This process helps to improve the longevity and aesthetics of the wood floor.
By removing scratches, dents, and other imperfections, floor sanding can restore the original beauty of the wood floor. It can also help to even out the surface of the wood, creating a smooth and uniform finish. This not only enhances the overall look of the room but also protects the wood from further damage.
Preparing the floor before sanding is crucial for a successful sanding process. This includes removing furniture, rugs, and other items from the room, as well as cleaning the floor to remove dirt and debris. It is also important to check for any loose boards or nails and repair any damage before sanding. Additionally, it is important to consider the placement of electrical cables, recessed lighting, vents, and ventilation gaps to ensure they are not covered or damaged during the sanding process.
By properly preparing the floor, you can ensure that the sanding process is effective and that the final result is a beautiful and durable wood floor.
Overall, floor sanding is a necessary step in maintaining and restoring wood floors. It improves the longevity and aesthetics of the wood floor, and proper preparation is crucial for a successful sanding process.
Recognizing the Different Types of Wood Floors
The original answer is still applicable and provides accurate information about the common types of wood floors and how they affect the sanding process. I can refine the answer to include the additional context provided.
There are several types of wood floors, each with its own unique characteristics and benefits. The most common types of wood floors are solid wood, engineered wood, and laminate.
Solid wood floors are made from a single piece of wood and are the most durable type of wood floor. They are available in a variety of species, such as oak, maple, and cherry, and can be sanded and refinished multiple times. they are light-sensitive and require a minimum of seven days after the final coat of finish has been applied before they can be exposed to foot traffic. When sanding solid wood floors, it is important to ensure that the boards are cut in half or the skirting is removed to allow the boards to be lifted. Additionally, the product should not be applied over electrical cables, recessed lighting, existing vents, or ventilation gaps. Instead, installers should consider re-routing, re-laying in conduit/trunking, or de-rating electrical cables.
Engineered wood floors are made from multiple layers of wood and are more stable than solid wood floors. They are available in a variety of species, such as oak, maple, and cherry, and can be sanded and refinished once or twice. When sanding engineered wood floors, it is important to ensure that a breathable membrane or lnsupanel (Expanded Polystyrene Panel) is used to prevent moisture damage. This type of wood floor can also be sensitive to excessive moisture, so it is important to follow manufacturer guidelines for sanding and finishing.
Laminate floors are made from a composite material and are the least durable type of wood floor. They are available in a variety of colors and patterns and cannot be sanded or refinished. When it comes to laminate floors, sanding is not recommended as it can damage the surface layer and compromise the integrity of the floor.
PreSanding Preparations: Clearing and Cleaning the Room
To prepare the room for sanding, it is important to follow a few key steps. First, clear the room of furniture, rugs, curtains, and any other items that may obstruct the sanding process. Use proper lifting techniques to move furniture safely and avoid injury. For items that cannot be moved, such as built-in furniture or fixtures, cover them with plastic sheeting or a dust sheet to protect them from dust and debris.
Once the room is cleared, it is crucial to clean the floor thoroughly to remove dirt and debris. Vacuum the floor using a vacuum cleaner with a HEPA filter or a dust extraction system to effectively capture and remove dust particles. Avoid using excessive water when mopping the floor, as this can damage the sealant. Instead, use a damp mop with minimal water.
Before sanding, inspect the floor for any loose boards or nails and repair any damage. It is also important to consider the placement of electrical cables, recessed lighting, vents, and ventilation gaps to ensure they are not covered or damaged during the sanding process. Additionally, using a vapour permeable membrane with sealed joints below the flooring can help maintain proper moisture levels.
By following these steps, you can ensure that the room is properly prepared for sanding, creating an optimal environment for achieving a smooth and professional finish on your wood floor.
Assessing the Condition of Your Wood Floor
Assessing the condition of your wood floor is an important step in determining whether it is suitable for sanding. Signs of damage to look for include scratches, dents, warping, cupping, discoloration, stains, and water damage. These can be caused by everyday wear and tear, water damage, exposure to sunlight, or chemical spills.
To determine if your wood floor is suitable for sanding, it is important to inspect the floor for any signs of damage. If damage is found, it is recommended to have a professional wood flooring expert, such as an NWFACP Certified Professional or NWFA Member, evaluate the damage to ensure appropriate action is taken.
If the damage is minor, it may be possible to repair it before sanding. This can include filling in scratches and dents with wood filler, replacing loose boards or nails, and addressing any water damage or stains. if the damage is extensive or the floor has been exposed to excessive moisture, it may not be suitable for sanding and may require replacement.
When assessing the condition of your wood floor, it is important to consider the overall integrity of the floor, the extent of the damage, and the potential for successful repair. Consulting with a professional can provide valuable guidance and ensure that the appropriate steps are taken to restore or replace the wood floor.
Understanding the Role of the Subfloor in Sanding
Understanding the Role of the Subfloor in Sanding
The subfloor is an essential component of the sanding process as it provides a stable base for the flooring and helps to reduce noise and vibration. It also acts as insulation against cold temperatures and moisture. When assessing the condition of the subfloor, it is important to look for signs of damage such as warping, cupping, or discoloration. Additionally, check for loose boards or nails and repair any damage before sanding. Consider the placement of electrical cables, recessed lighting, vents, and ventilation gaps to ensure they are not covered or damaged during the sanding process.
In the case of suspended timber ground floors, the floor joists are raised above the subfloor on small supporting walls called tassel walls or sleeper walls. A wall plate is attached to the top of these walls, on which the floor joists rest. A damp-proof course is used to separate the wall plates from the tassel walls, preventing decay from rising moisture. It is also common to have gaps in the blockwork of the tassel/sleeper walls to ensure adequate air circulation.
If the subfloor is not in a suitable condition, measures should be taken to renovate it. This may involve sanding the subfloor or using leveling compounds to achieve the required flatness. Pre-treating heavily absorbent subfloors with a primer is important, and moisture tests may be necessary to ensure the subfloor meets specified requirements.
By properly assessing and addressing the condition of the subfloor, you can ensure a successful sanding process and achieve a beautiful and durable finish for your wood floor.
The Importance of Moisture Content in Wood Floor Sanding
The original answer is still applicable and provides accurate information about the importance of moisture content in wood floor sanding. I can refine the answer to include the additional context provided.
Moisture content is an important factor to consider when sanding a wood floor. The moisture content of the wood affects the sanding process, as too much moisture can cause the wood to swell and warp, while too little moisture can cause the wood to shrink and crack. It is crucial to check the moisture content of the wood before sanding to ensure the process is done correctly and safely.
To check the moisture content of your wood floor, you can use a moisture meter. This device measures the amount of moisture in the wood and provides a reading in percentage. The ideal moisture content for sanding is typically between 8-12%. If the moisture content is higher than 12%, it is recommended to wait until the wood has dried to the correct level before sanding. If the moisture content is lower than 8%, it may be necessary to humidify the wood floor before sanding to prevent excessive shrinkage and cracking.
In addition to checking the moisture content of the wood, it is important to consider the environment when sanding a wood floor. Monitoring the humidity and temperature of the room is crucial to ensure the wood does not absorb too much moisture or dry out too quickly. The ideal humidity level for sanding is between 40-60%, and the ideal temperature is between 18-22C. These conditions help to maintain the stability of the wood and ensure a successful sanding process.
By considering the moisture content of the wood and creating the appropriate environment, you can achieve a smooth and professional finish while minimizing the risk of damage to the wood floor.
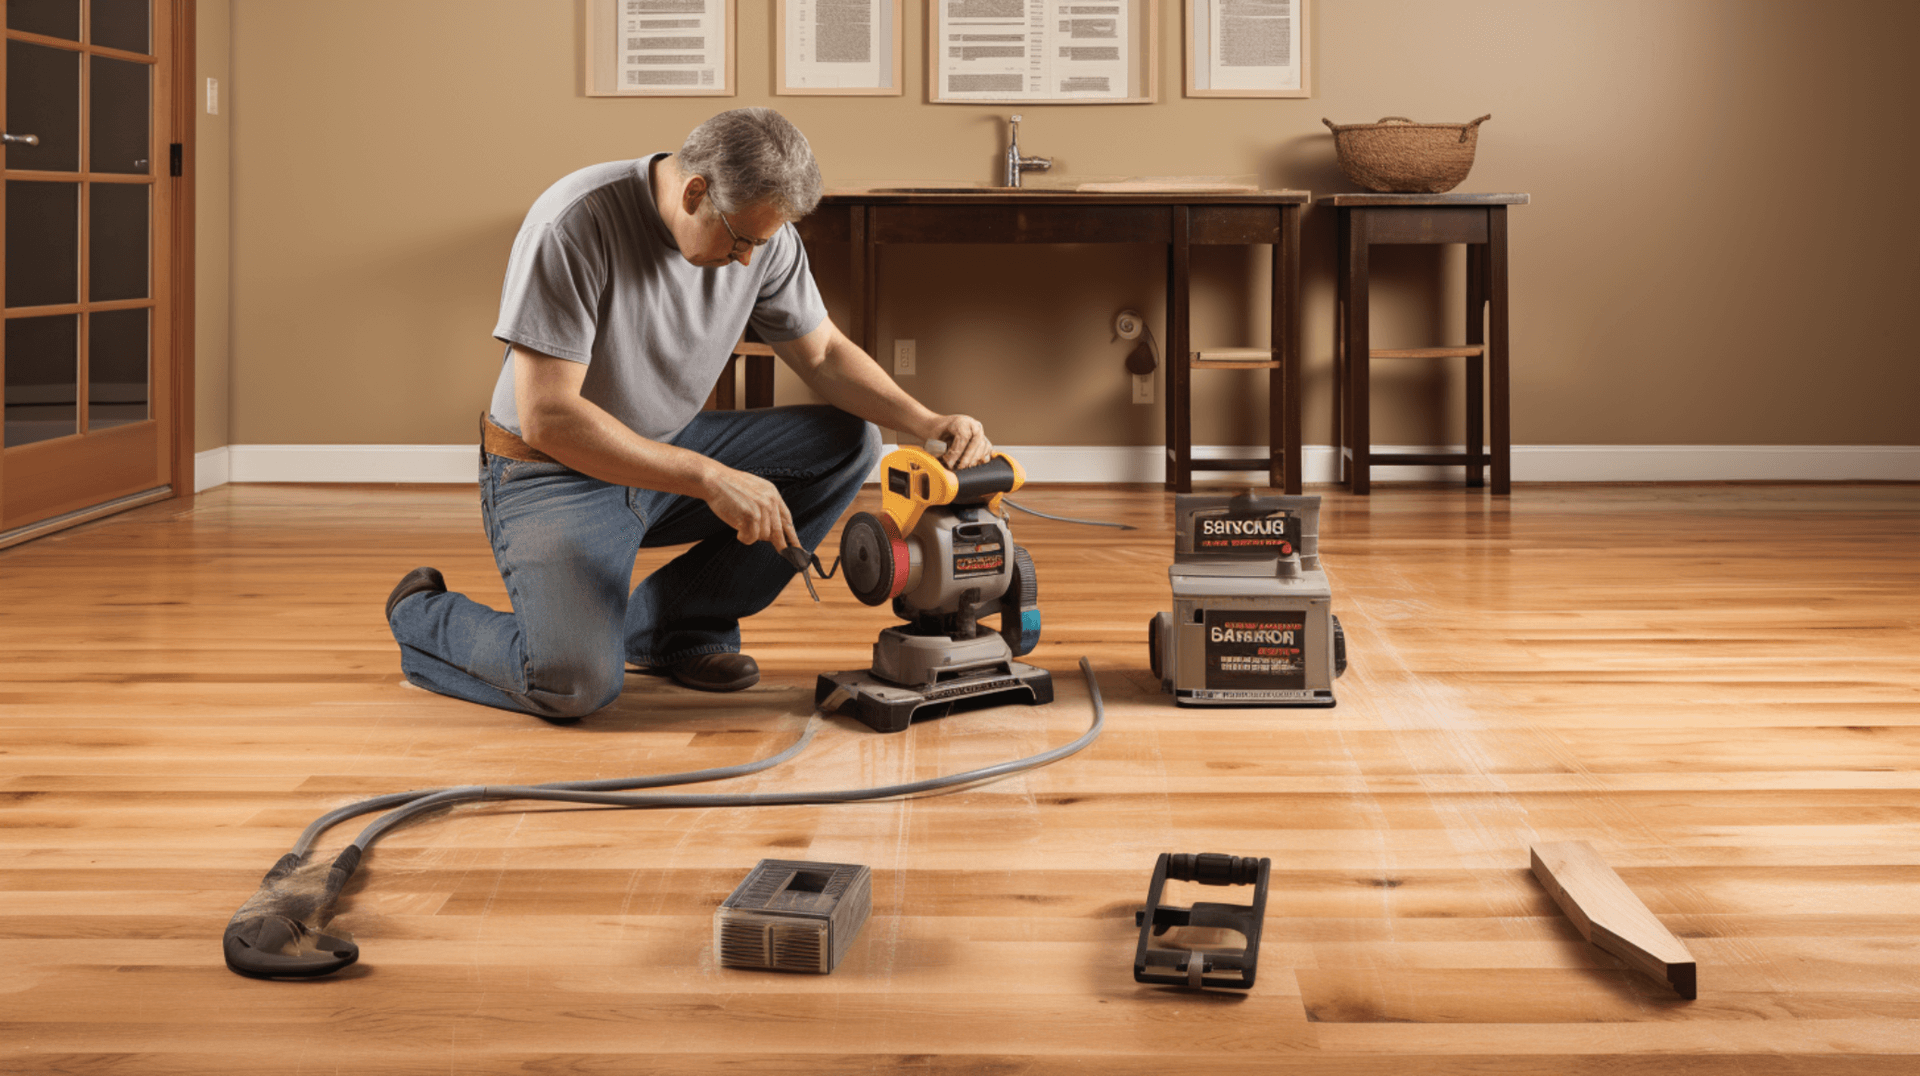
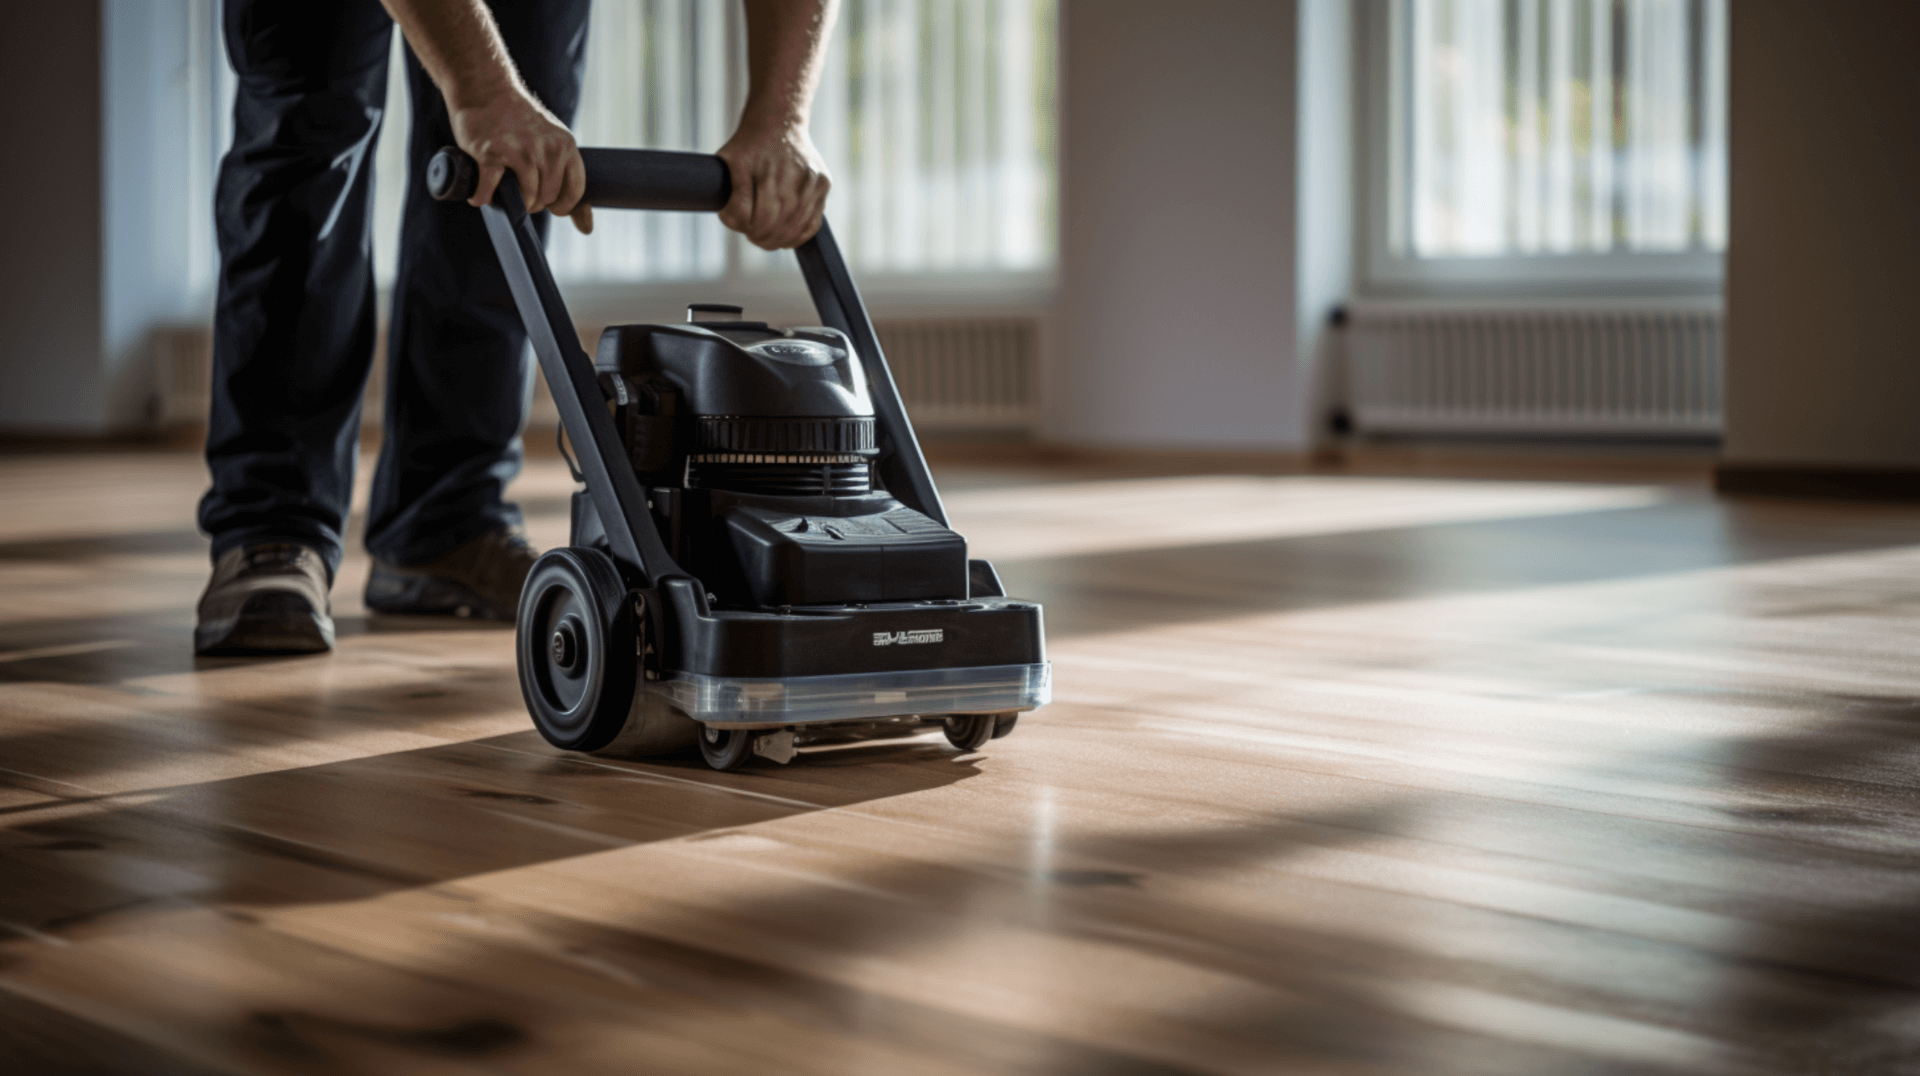
Choosing the Right Sanding Equipment for Your Wood Floor
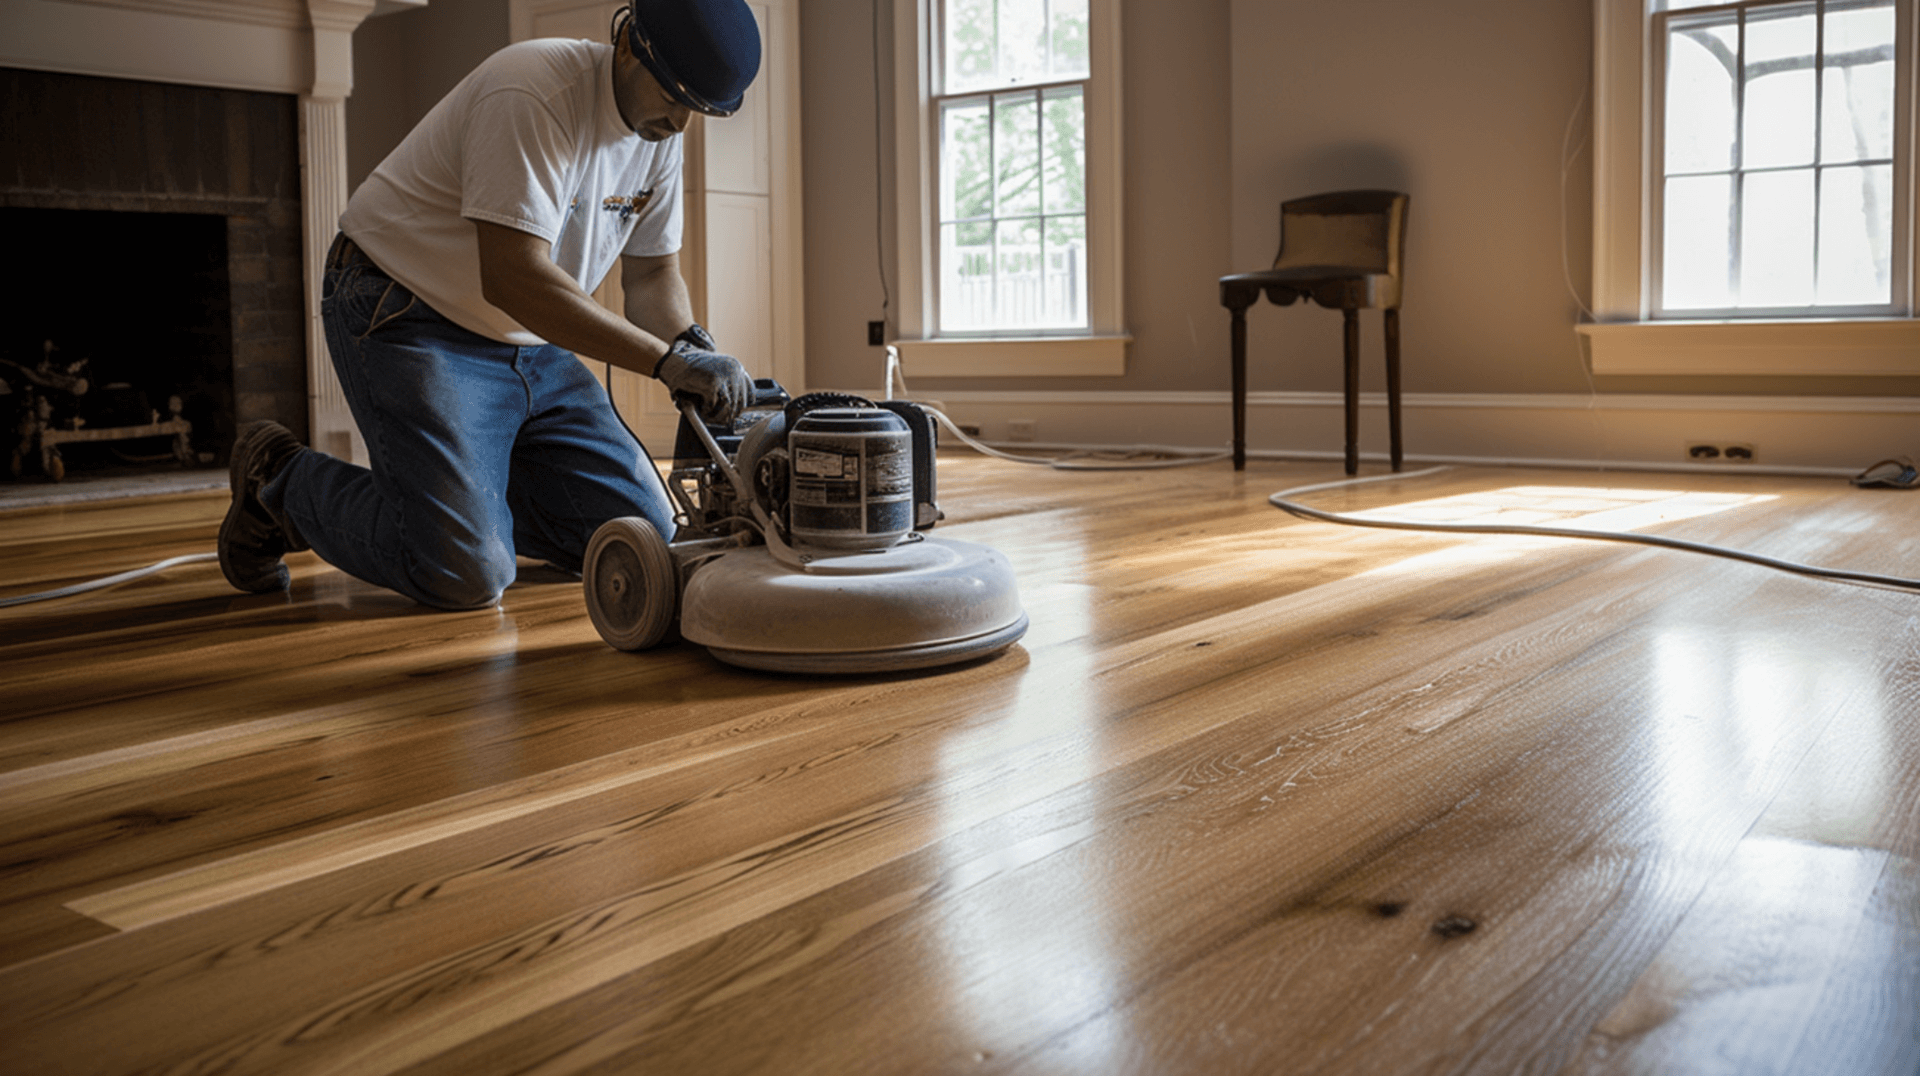
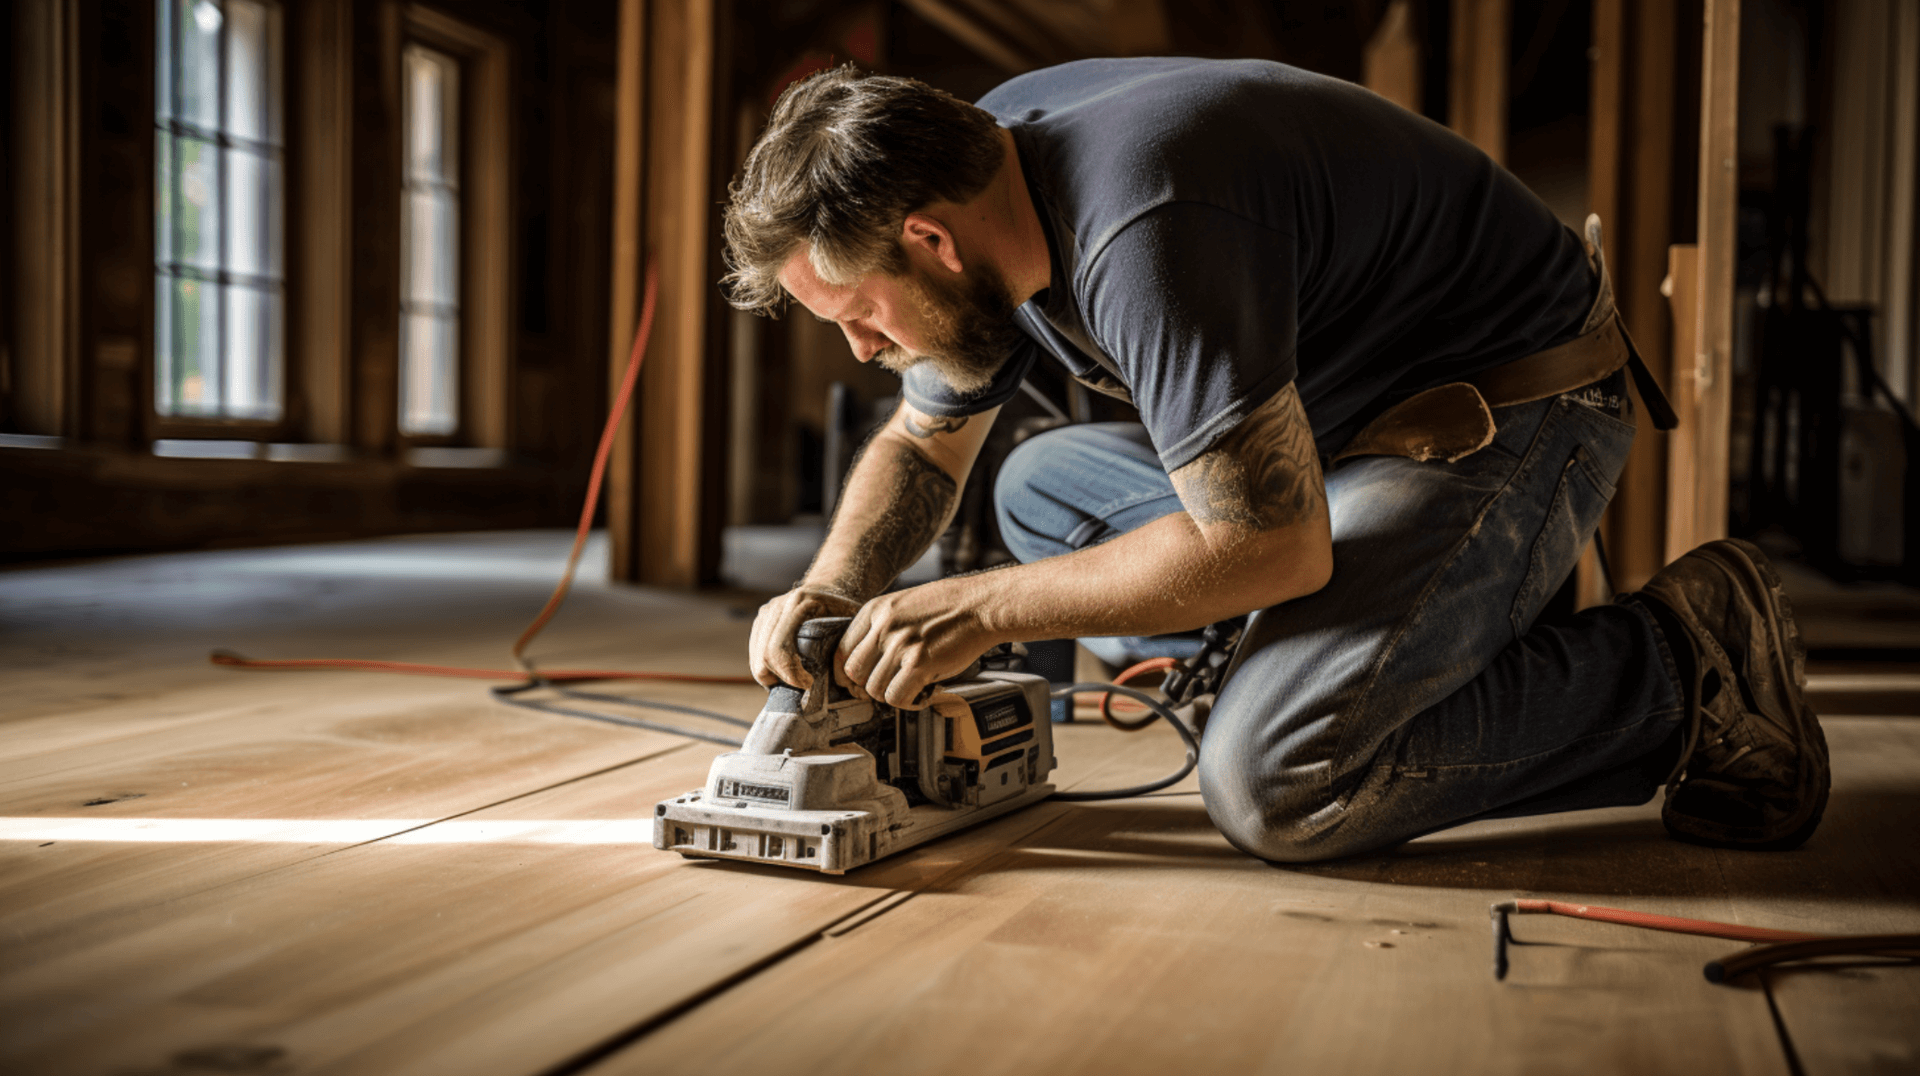
When sanding a wood floor, it is important to choose the right sanding equipment for the job. There are several types of sanding machines available, each with its own unique benefits and drawbacks.
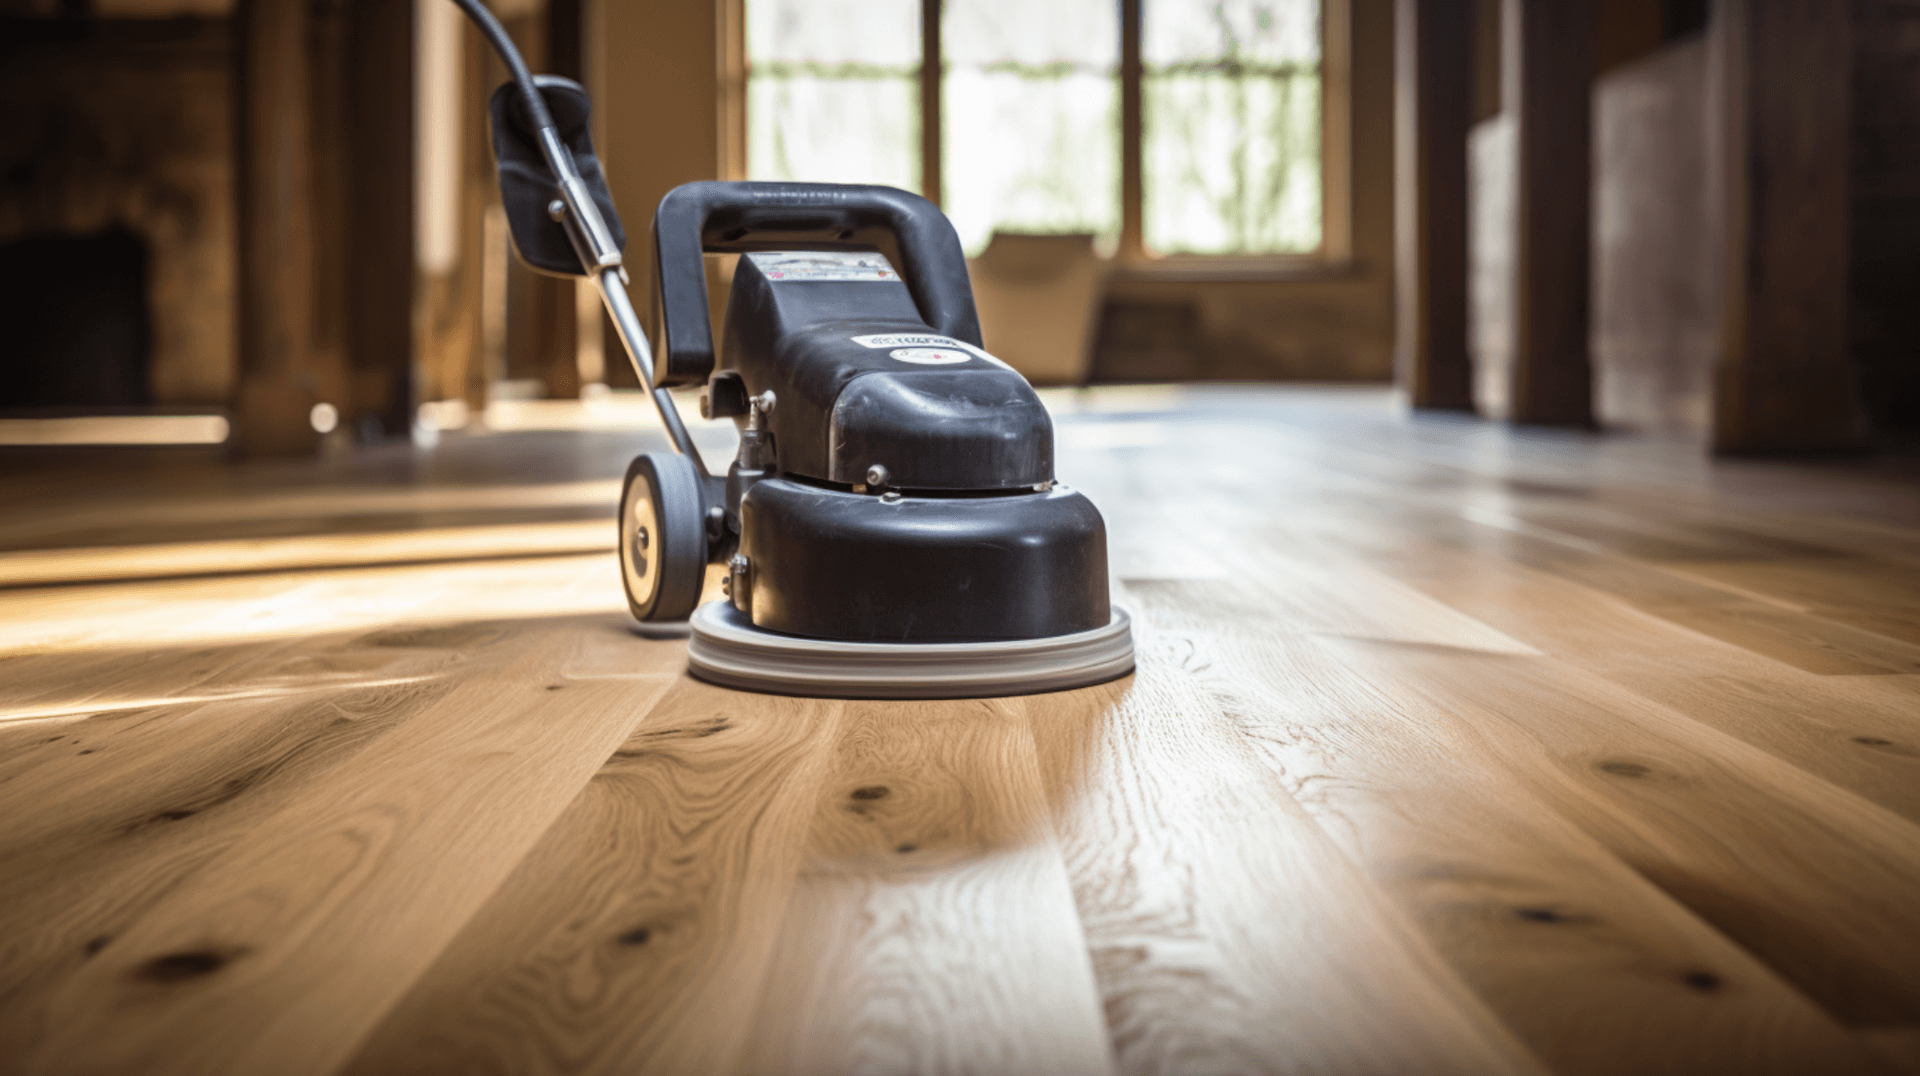
Drum sanders are the most powerful type of sanding machine and are ideal for large areas of wood flooring. They are equipped with a large sanding drum that rotates at high speeds, allowing for a fast and efficient sanding process. they can be difficult to control and can cause damage to the wood if not used properly.
Orbital sanders are the most common type of sanding machine and are suitable for most types of wood flooring. They are equipped with a sanding pad that rotates in an orbital motion, allowing for a more precise sanding process. They are also easier to control than drum sanders and are less likely to cause damage to the wood.
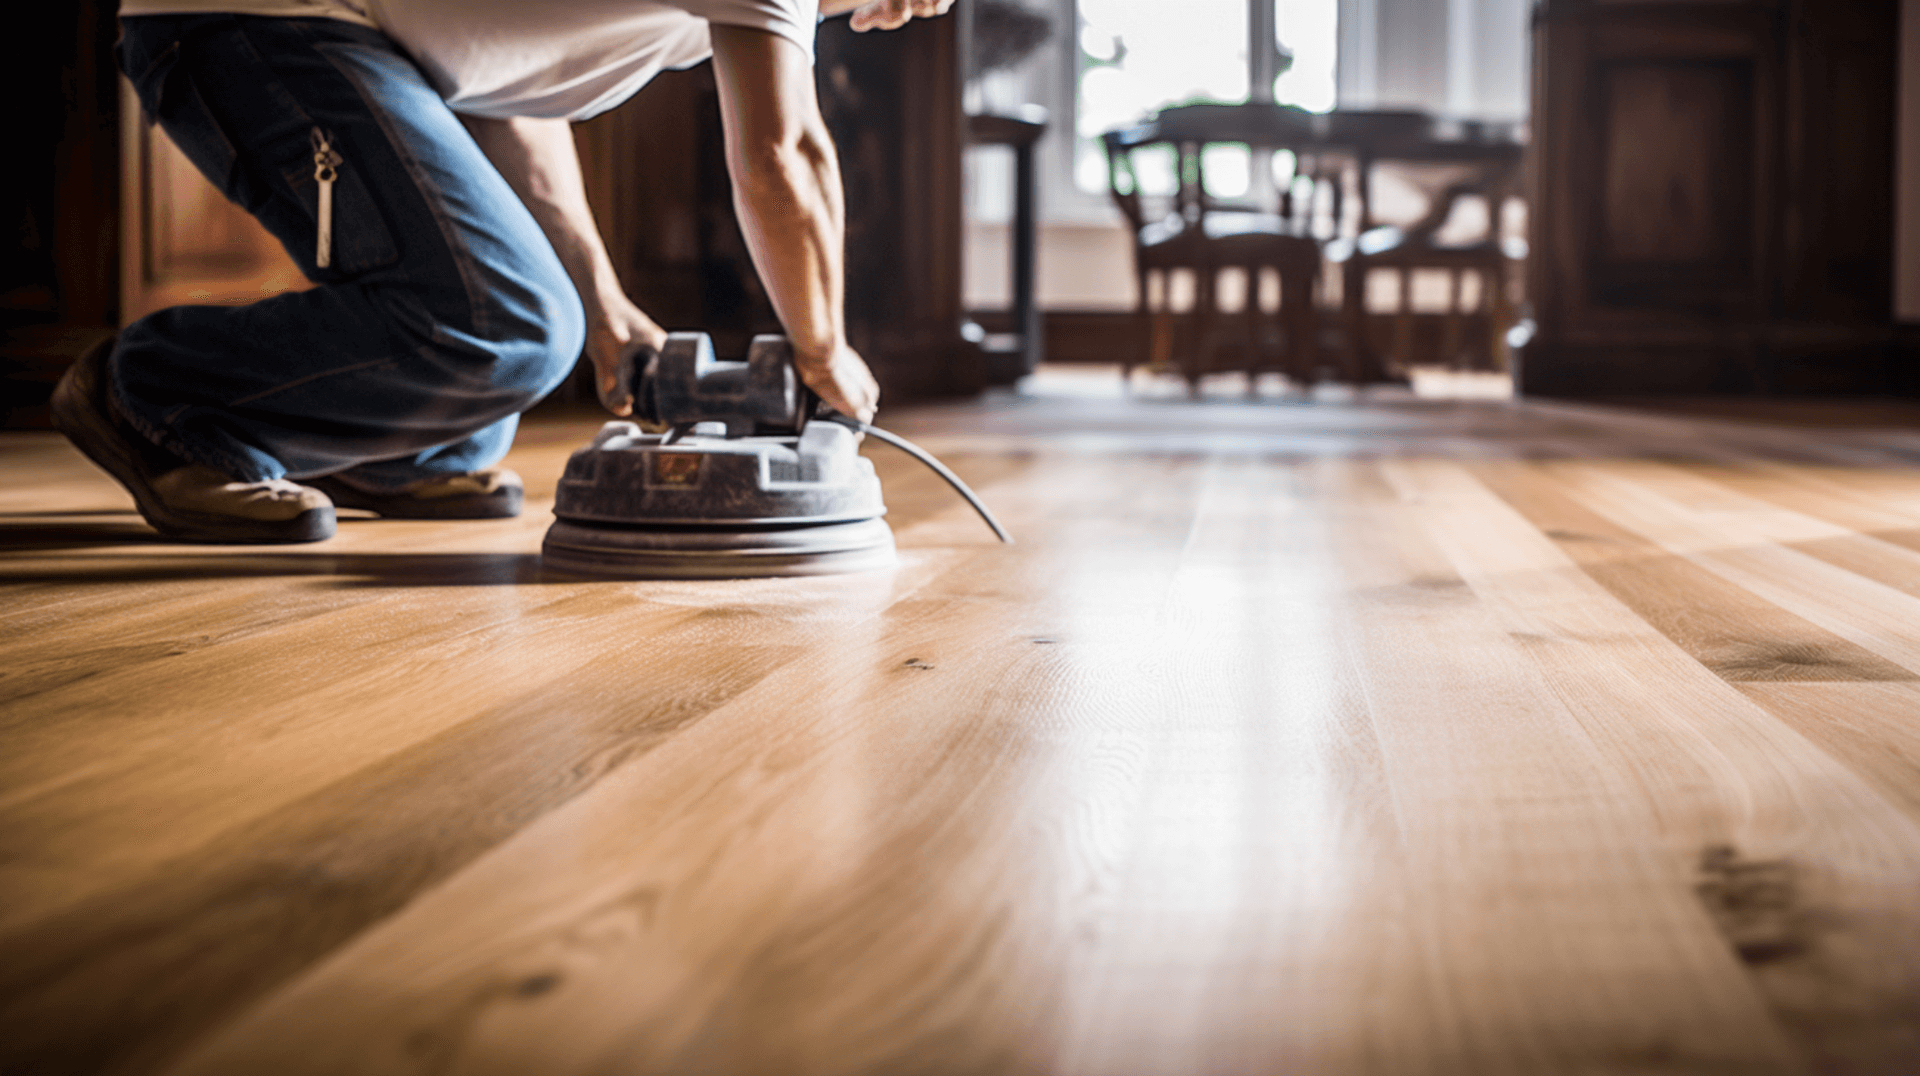
Edge sanders are designed for sanding the edges and corners of a wood floor. They are equipped with a sanding pad that rotates in a circular motion, allowing for a more precise sanding process in tight spaces.
When choosing the right sanding machine for your specific type of wood floor, it is important to consider the size of the area you will be sanding. Drum sanders are best suited for large areas, while orbital sanders are more versatile and can be used for both large and small areas. Edge sanders are specifically designed for sanding edges and corners, so they are ideal for finishing touches.
Additionally, consider the condition of your wood floor. If you have deep scratches or stains, a drum sander may be necessary to remove them effectively. if your wood floor is in good condition and only requires light sanding, an orbital sander may be sufficient.
Overall, choosing the right sanding machine for your wood floor depends on the size of the area, the type of sanding required, and the condition of the floor. Assess your specific needs and choose the appropriate sanding machine to achieve the best results.
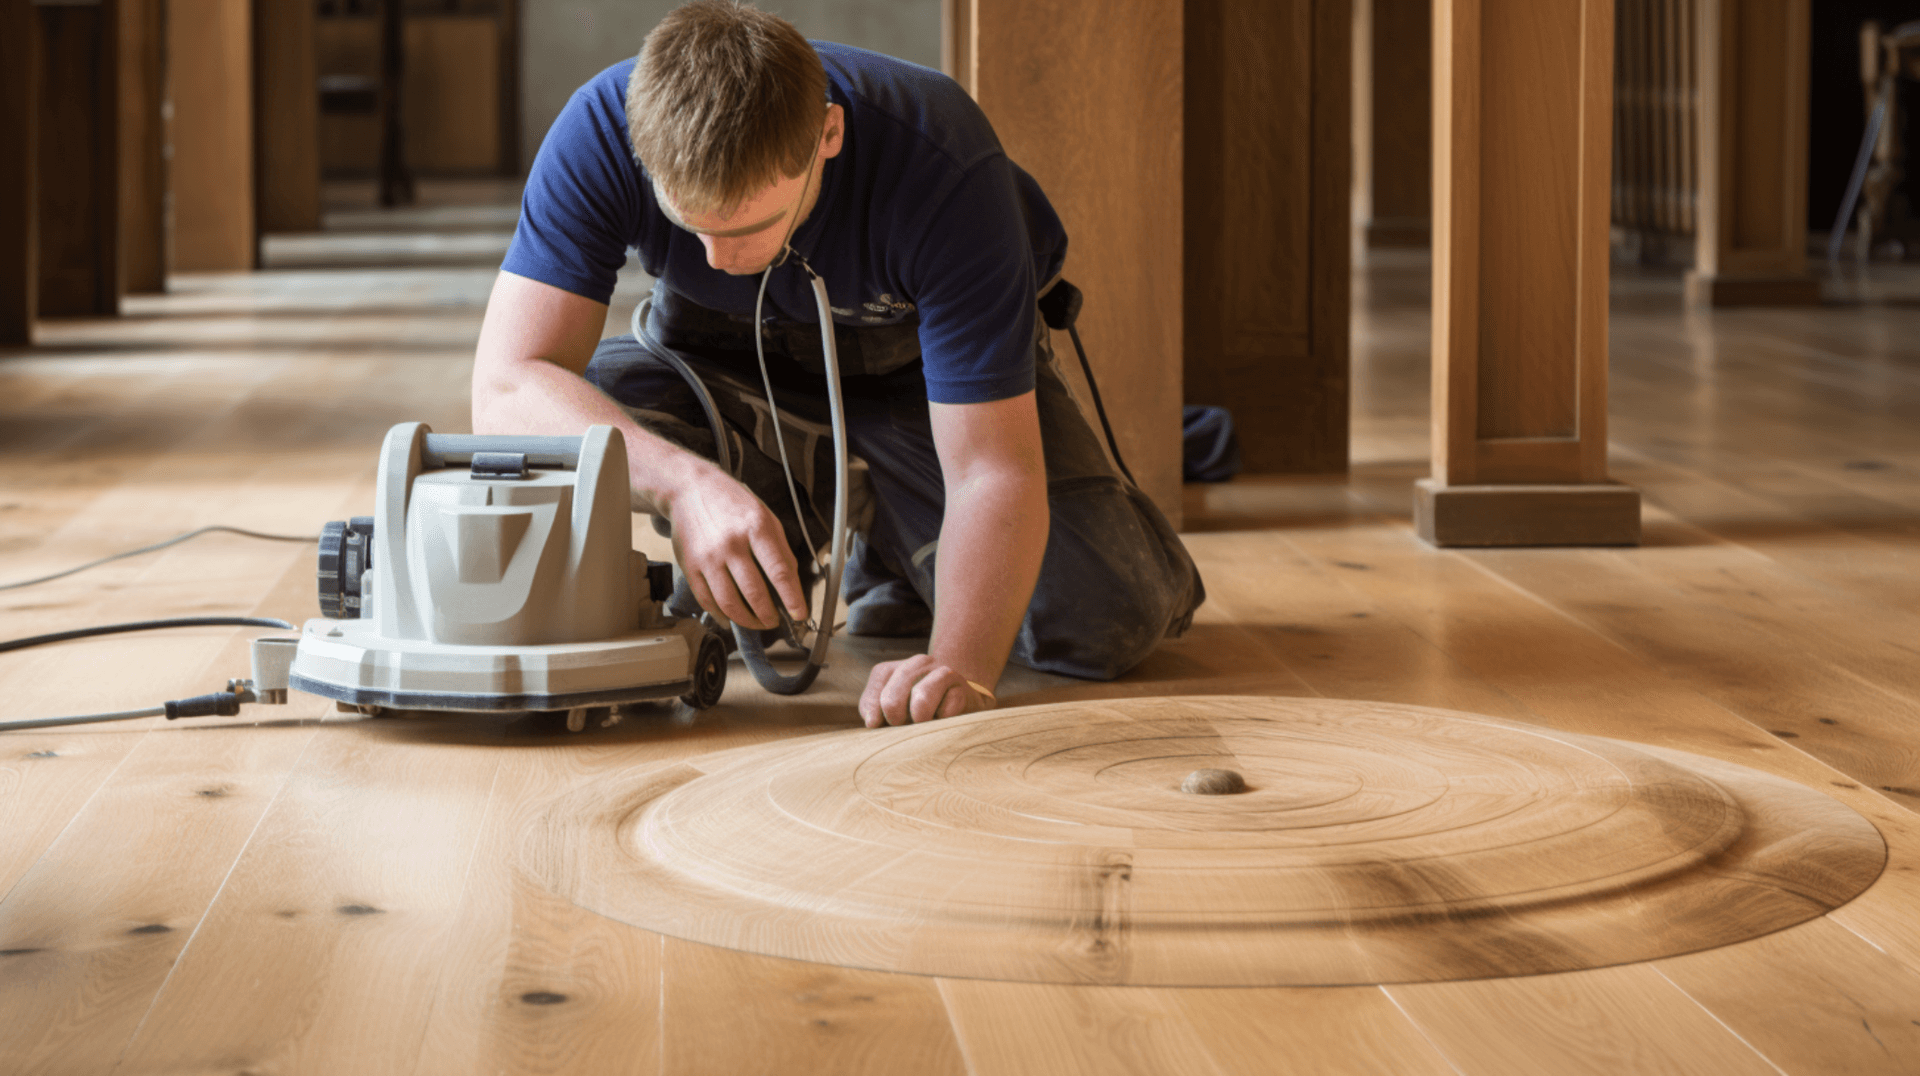
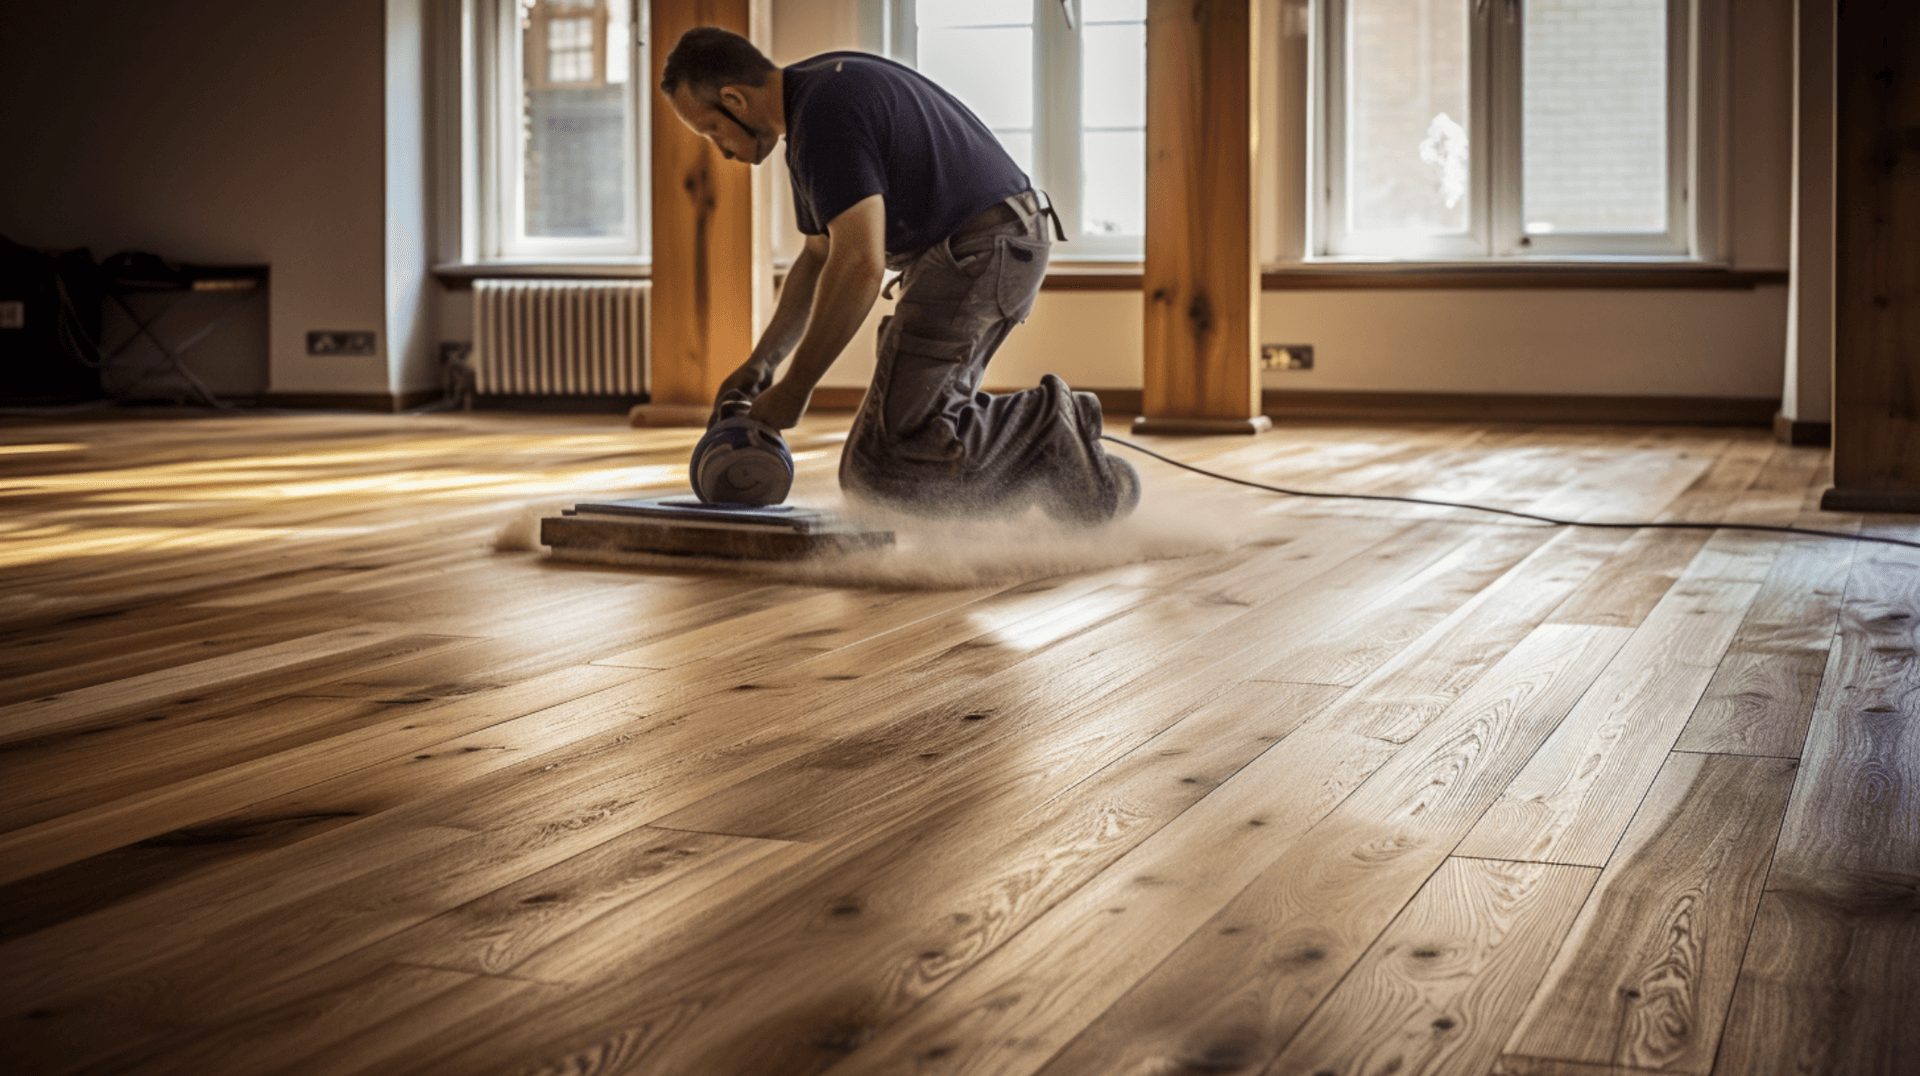
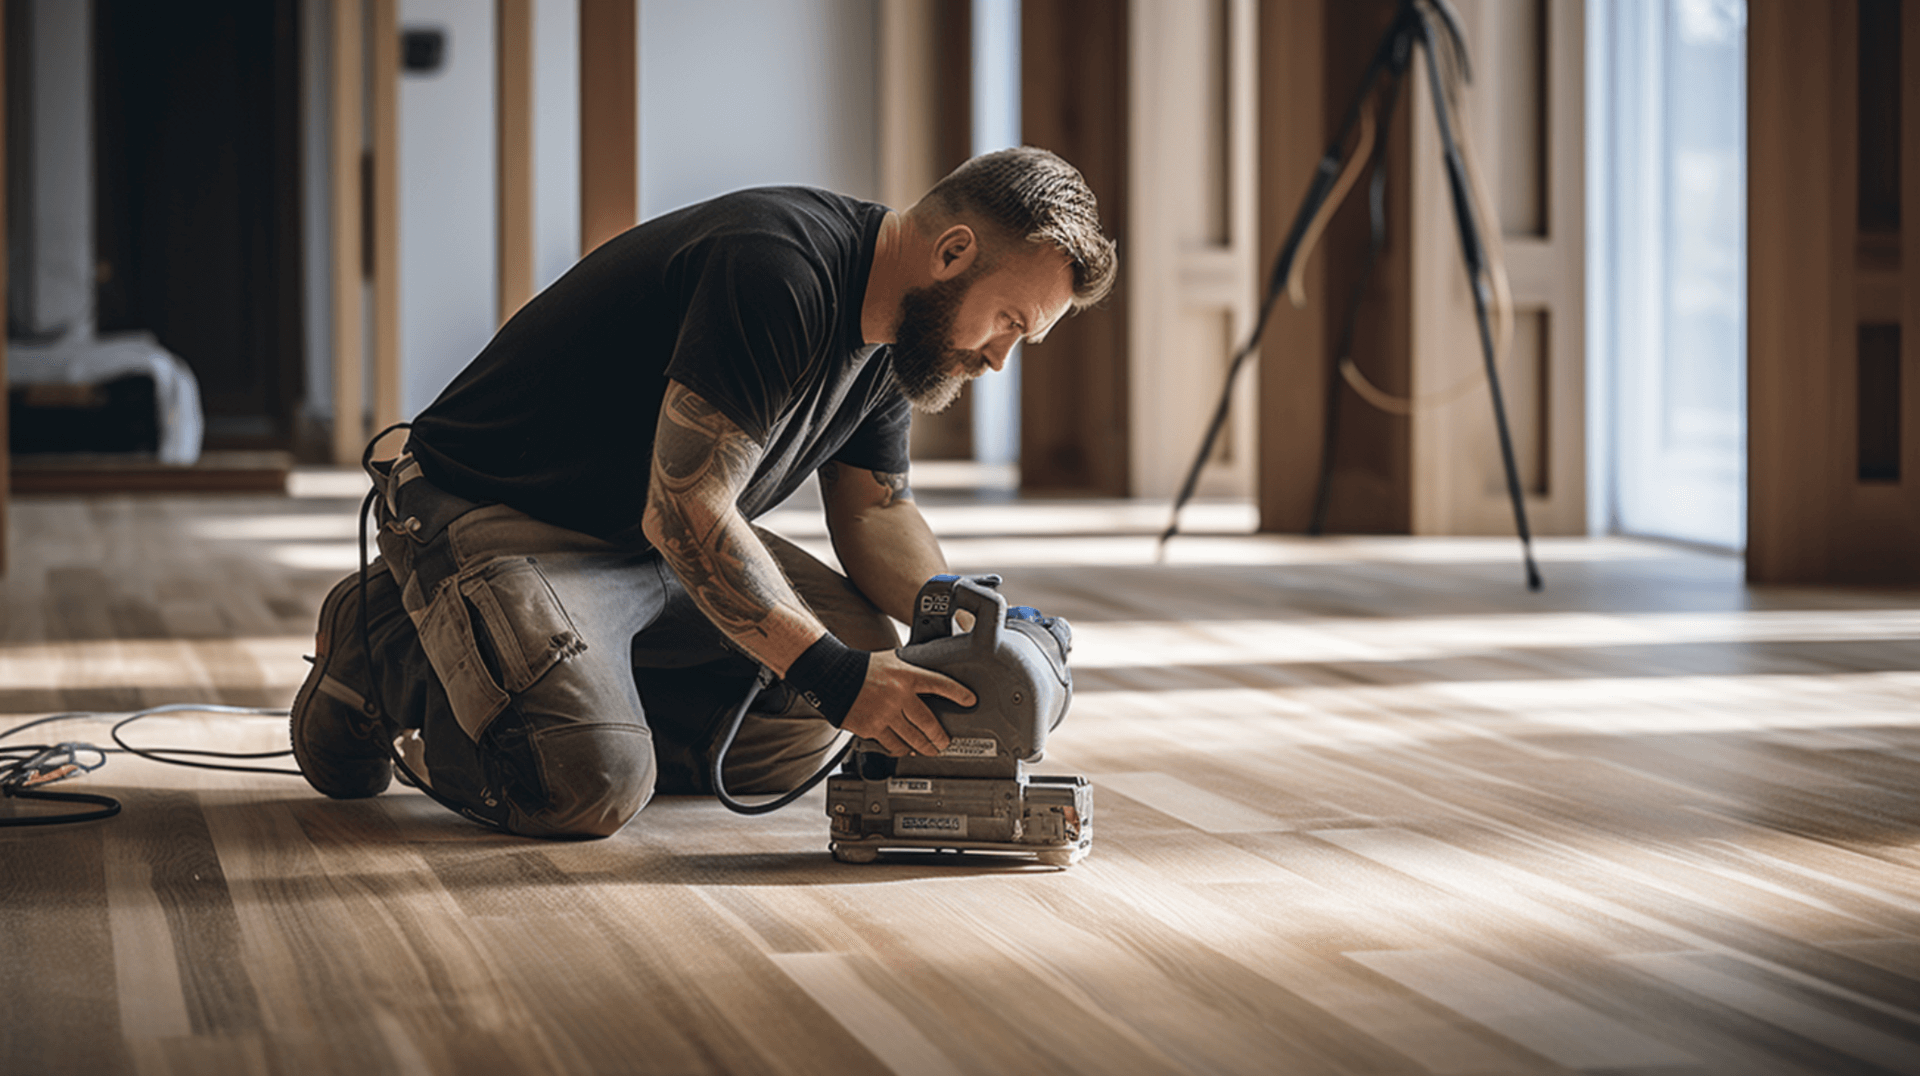
The Sanding Process: Techniques and Best Practices
The recommended process for sanding a wood floor is to start with a coarse grit sandpaper and gradually work up to a finer grit. This will help to remove any existing scratches, stains, and imperfections, and will also help to create a smooth and even surface. It is important to use a vacuum cleaner or dust extraction system to remove any dust and debris between each sanding step.
The sanding technique may vary depending on the type of wood floor. For example, hardwood floors require a more aggressive sanding technique than softer woods, such as pine. Additionally, the type of sandpaper used may vary depending on the type of wood. Coarse grit sandpaper is typically used for hardwoods, while finer grit sandpaper is used for softer woods.
When sanding a wood floor, it is important to avoid common mistakes such as sanding too aggressively, using the wrong type of sandpaper, or sanding in the wrong direction. Additionally, it is important to avoid sanding too close to the edges of the floor, as this can cause the edges to become uneven. Using a consistent and even sanding motion, and avoiding spending too much time in one spot, will help to achieve a more uniform finish.
By following these techniques and best practices, home owners and business owners can successfully sand their wood floors and achieve a smooth and professional result.
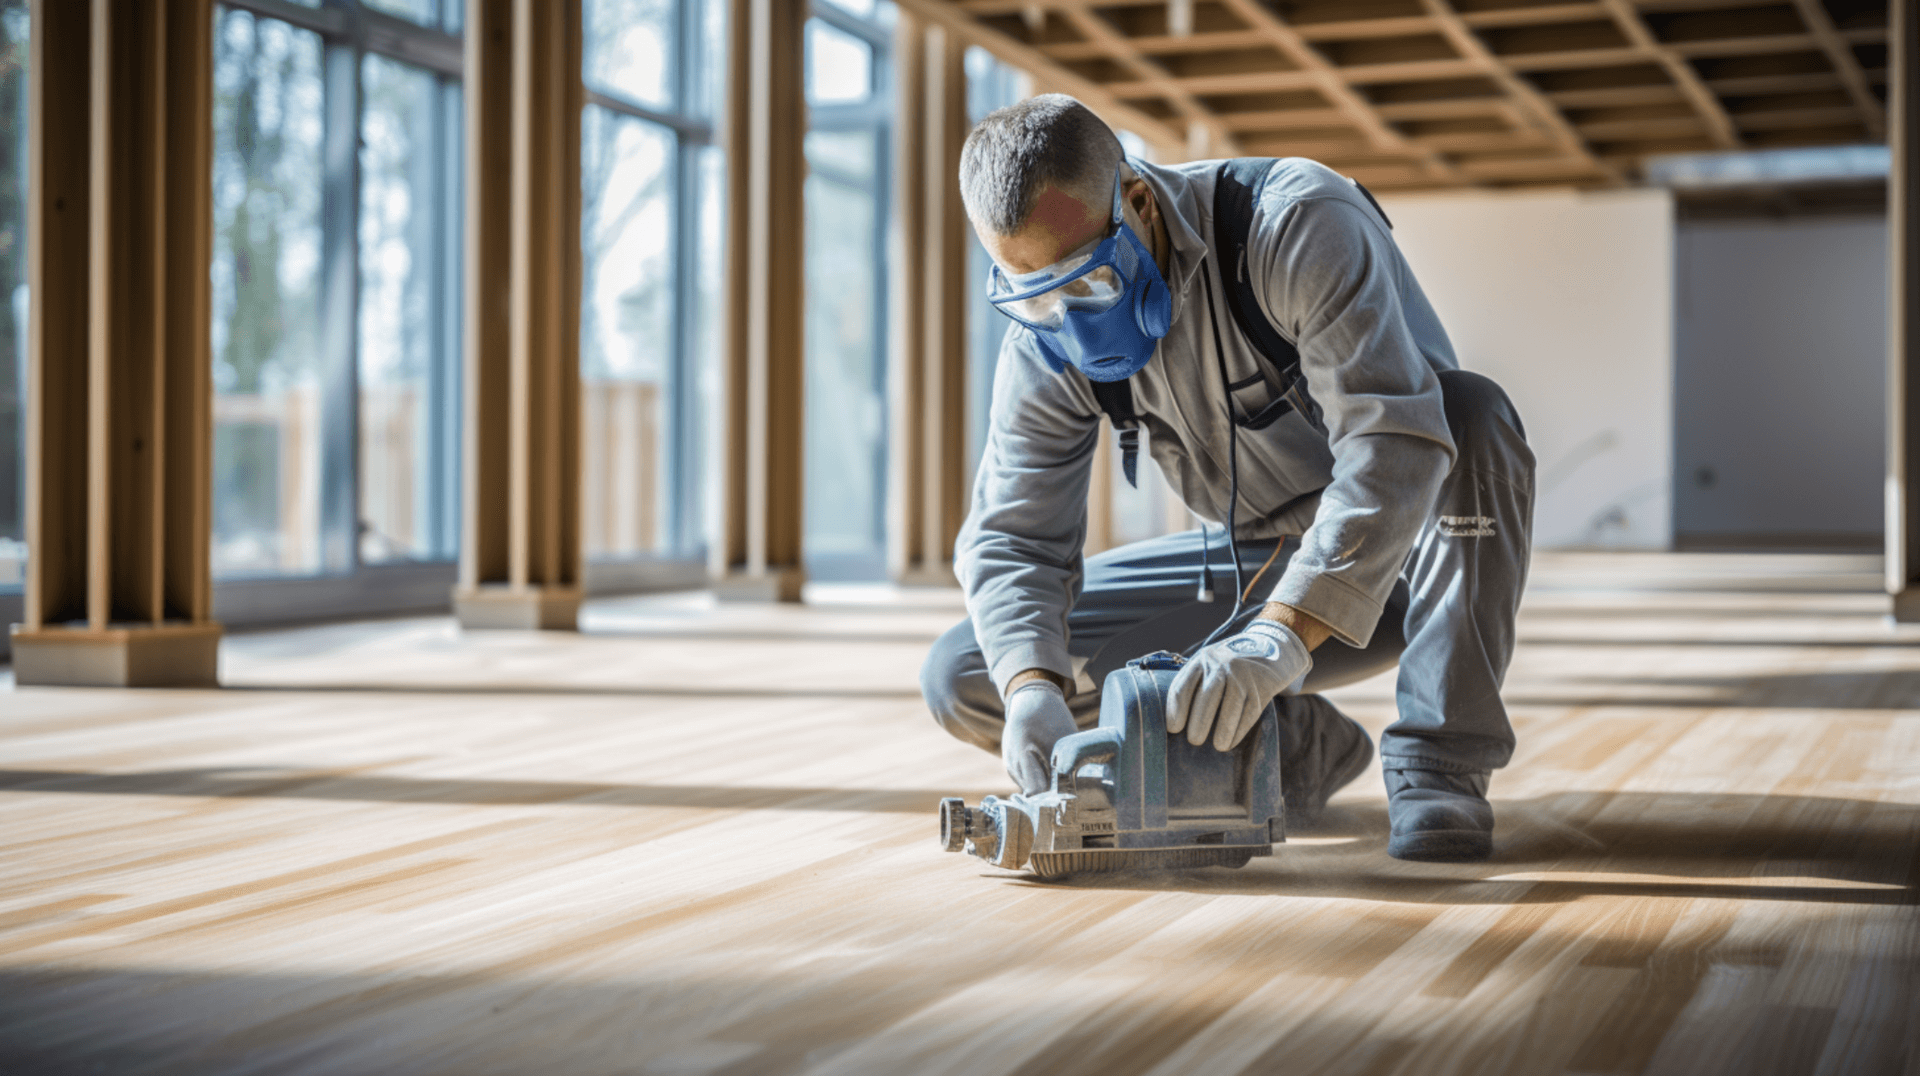
Health and Safety Measures During Floor Sanding
To ensure a safe and healthy environment during and after sanding, it is important to take the necessary safety precautions and use the appropriate personal protective equipment (PPE). This applies to both home owners and business owners.
During the sanding process, it is crucial to wear safety goggles, a dust mask, and ear protection to protect against dust and debris. Safety goggles will shield the eyes from flying particles, while a dust mask will prevent inhalation of harmful dust. Ear protection is necessary to reduce the risk of hearing damage from the loud noise generated by the sanding machine. Wearing long sleeves and trousers is also recommended to protect the skin from dust and debris.
In addition to wearing PPE, it is important to ensure the room is well ventilated. Open windows and doors to allow fresh air to circulate and use a dust extraction system or vacuum cleaner with a HEPA filter to capture and remove dust particles. This will help to minimize the amount of dust in the air and create a safer environment.
When sanding a wood floor, it is important to take special precautions with special nonskid pads that are frequently placed under area rugs. Some of these pads may imprint their pattern (surface impressions) onto the floor when the rug is removed. To avoid this, it is recommended to remove the nonskid pads before sanding or use a different type of nonskid pad that is less likely to leave marks.
When sanding is complete, it is important to clean the room thoroughly to remove any remaining dust and debris. Vacuum the floor using a vacuum cleaner with a HEPA filter or a dust extraction system to effectively capture and remove dust particles. Avoid using excessive water when mopping the floor, as this can damage the sealant. Instead, use a damp mop with minimal water.
By following these safety precautions and maintaining a clean and well-ventilated environment, home owners and business owners can ensure the safety and health of themselves and others during and after the floor sanding process.
PostSanding Activities: Cleaning and Inspection
After sanding a wood floor, it is important to clean the room thoroughly to remove any remaining dust and debris. Vacuum the floor using a vacuum cleaner with a HEPA filter or a dust extraction system to effectively capture and remove dust particles. Avoid using excessive water when mopping the floor, as this can damage the sealant. Instead, use a damp mop with minimal water.
Once the room is clean, it is important to inspect the floor for any missed spots or imperfections. Look for any scratches, stains, or uneven surfaces that may have been missed during the sanding process. If any issues are found, it is important to take the necessary measures to fix them. For minor imperfections, such as scratches or small dents, it may be possible to use a wood filler to fill in the gaps. For larger imperfections, such as deep scratches or gouges, it may be necessary to sand the area again and apply a new coat of sealant.
If any areas of the floor are uneven, it may be necessary to use a leveling compound to even out the surface. This is a special type of compound that is applied to the floor and allowed to dry before sanding. It is important to follow the manufacturer’s instructions for the leveling compound to ensure proper application and drying.
After addressing any missed spots or imperfections, it is important to re-inspect the floor to ensure that all issues have been resolved. Take the time to walk across the floor and visually inspect it from different angles to ensure a smooth and even finish.
By thoroughly cleaning the room, inspecting the floor for any missed spots or imperfections, and taking the necessary measures to fix any issues found, home owners and business owners can ensure a high-quality and flawless finish for their wood floor.
Expert Advice: Tips and Tricks from GJP Floor Sanding Professionals
Floor sanding is a great way to restore the beauty of your wood floor and extend its life. GJP Floor Sanding professionals have years of experience in the industry and can provide expert advice and assistance to ensure your project is a success. Here are some tips and tricks from GJP Floor Sanding professionals to help you get the best results from your floor sanding project.
First, it is important to choose the right sanding machine for the job. Drum sanders are best suited for large areas, while orbital sanders are more versatile and can be used for both large and small areas. Edge sanders are specifically designed for sanding edges and corners, so they are ideal for finishing touches.
Second, it is important to use the correct sandpaper grit for the job. Coarse grit sandpaper is typically used for hardwoods, while finer grit sandpaper is used for softer woods. Additionally, it is important to use a consistent and even sanding motion, and avoid spending too much time in one spot, to achieve a more uniform finish.
Third, it is important to take the necessary safety precautions and use the appropriate personal protective equipment (PPE). This includes safety goggles, a dust mask, and ear protection to protect against dust and debris. Wearing long sleeves and trousers is also recommended to protect the skin from dust and debris.
GJP Floor Sanding professionals can assist you in your floor sanding project by providing expert advice and guidance. We can help you choose the right sanding machine and sandpaper grit for your specific needs. We can also offer tips on sanding techniques and safety precautions to ensure a successful and safe sanding process.
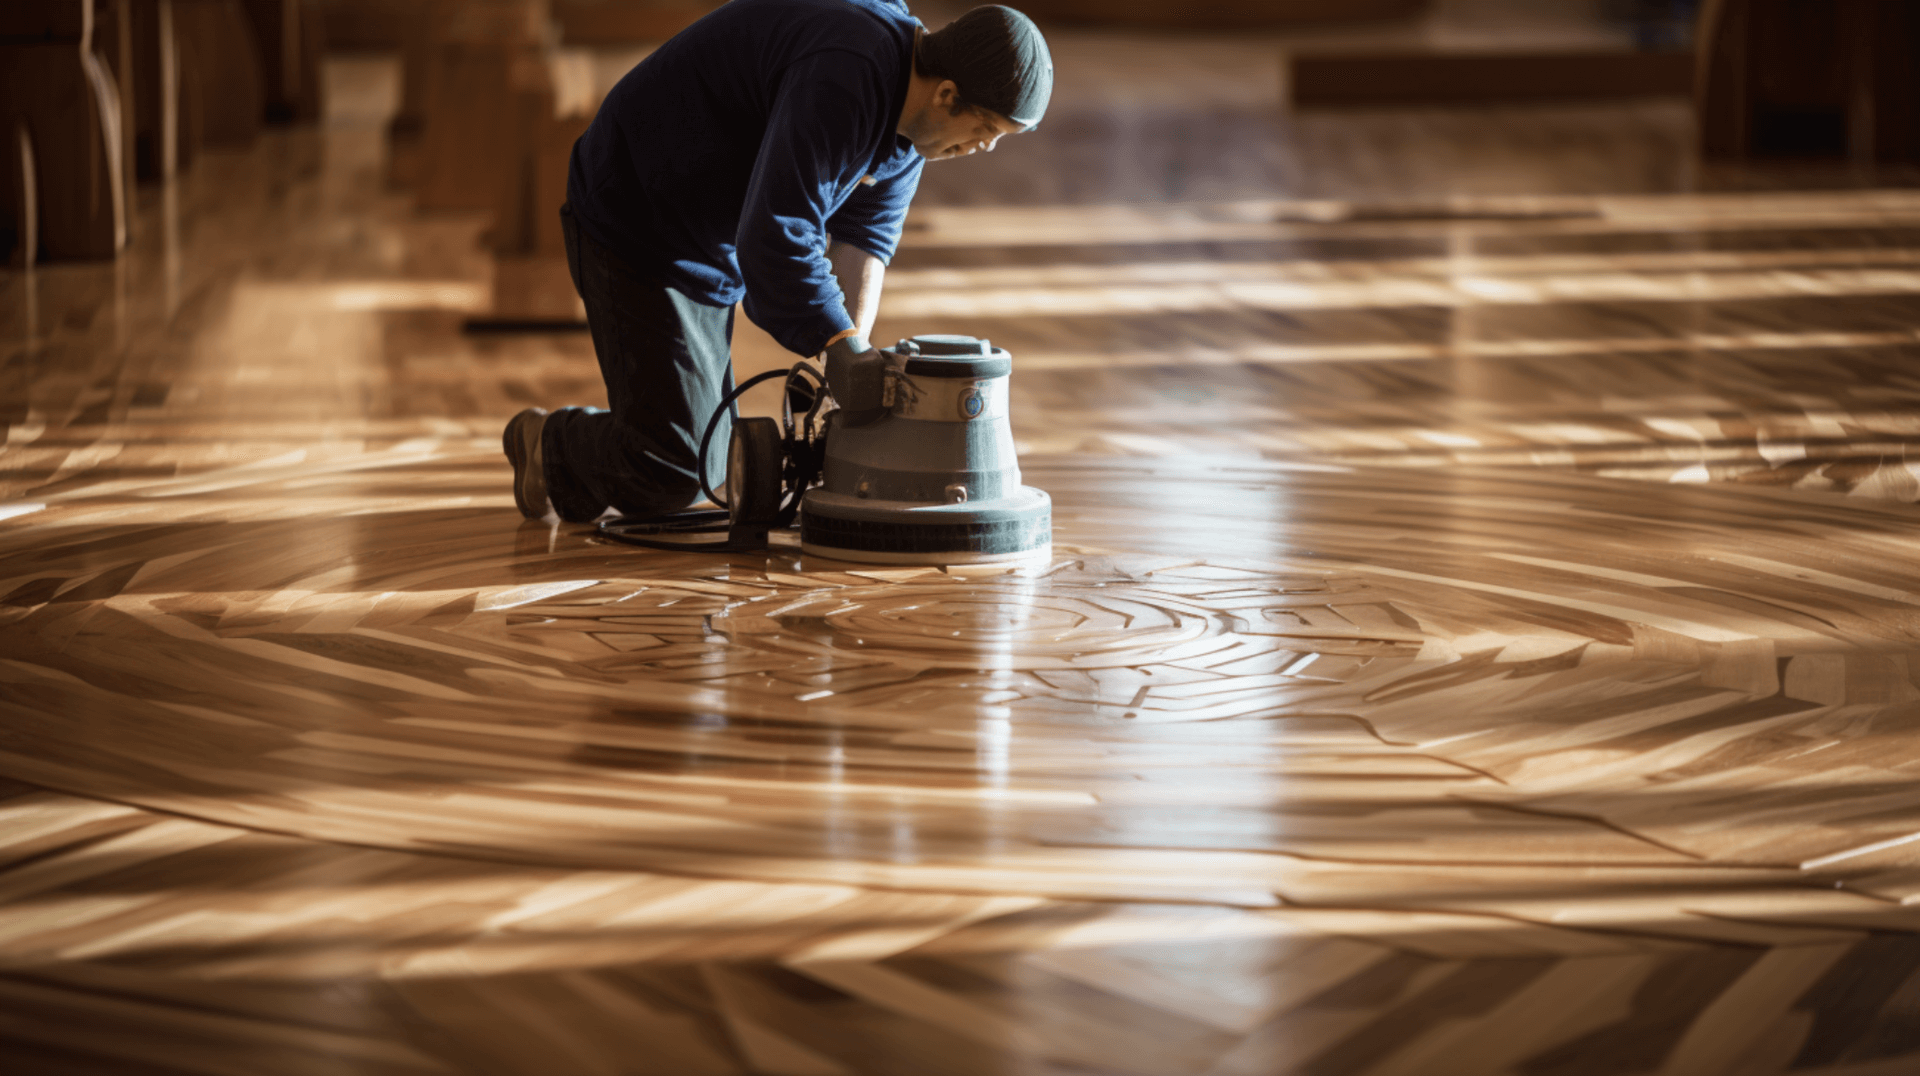
In addition to floor sanding, GJP Floor Sanding offers additional services to enhance the appearance and longevity of your wood floor. We provide a Premium Sanding Technology (PST) service, which includes pre-sanding with the HUMMEL belt sanding machine and fine sanding with the TRIO. This advanced sanding technology ensures a high-quality and flawless finish.
GJP Floor Sanding also offers sealing and finishing services to protect and enhance the beauty of your wood floor. We can apply a variety of finishes, including oils, lacquers, and stains, to achieve the desired look and provide long-lasting protection.
By utilizing the expertise of GJP Floor Sanding professionals and taking advantage of our additional services, you can ensure a successful floor sanding project and enjoy a beautiful and durable wood floor for years to come.
Contact Us: Get Professional Help from GJP Floor Sanding
To get in touch with GJP Floor Sanding for professional assistance, simply visit our website and fill out the contact form. Provide as much information as possible, including the type of wood floor, the size of the area, the desired finish, and any existing damage or imperfections. This will help GJP Floor Sanding to provide an accurate quote and the best advice for your specific needs.
When you choose GJP Floor Sanding for your wood floor sanding needs, you can be sure that you are getting the highest quality service. Our experienced professionals use the latest sanding technology and techniques to ensure a high-quality and flawless finish. We also offer additional services, such as sealing and finishing, to protect and enhance the beauty of your wood floor.
GJP Floor Sanding is committed to providing the best service and results for our customers. With our expertise and advanced sanding technology, you can be sure that your wood floor will look beautiful and last for years to come. We also provide additional tips and tricks to help you maintain and care for your wood floor after the sanding process.
Contact GJP Floor Sanding today to get professional assistance and ensure the success of your floor sanding project.